This guide will walk you through the process of setting up your DeepMyst account and making your first API call.Documentation Index
Fetch the complete documentation index at: https://docs.deepmyst.com/llms.txt
Use this file to discover all available pages before exploring further.
1. Create Your DeepMyst Account
Before using DeepMyst, you’ll need to sign up for an account:- Visit deepmyst.com to create your account
- Enter your email address and create a secure password
- Verify your email address by clicking the link sent to your inbox
- Complete your account setup by providing your organization details
2. Connect Your Model Providers
DeepMyst works with your existing model provider accounts. You’ll need to connect at least one provider to get started:- Navigate to the “Model Keys” section in the sidebar
- Click on “Add Provider”
- Select a provider (OpenAI, Anthropic, Google, Groq, etc.)
- Enter your API key for that provider
- Click “Save” to securely store your key
- Repeat for any additional providers you want to use
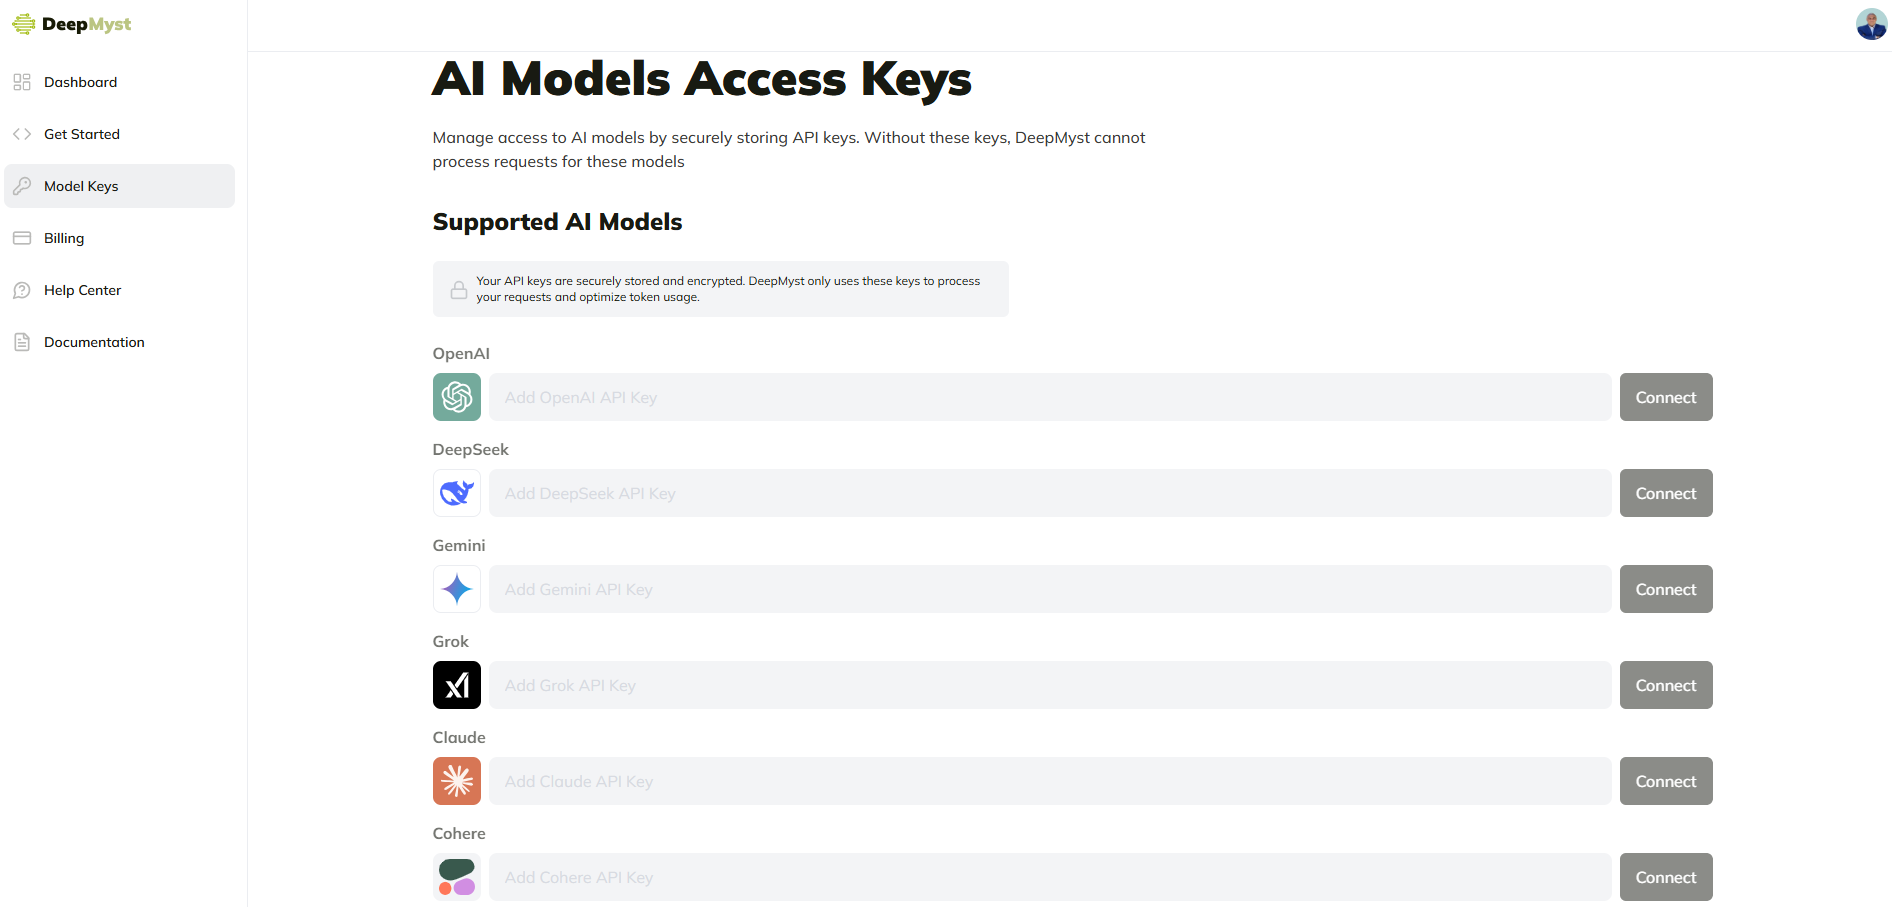
Note: DeepMyst securely encrypts and stores your provider API keys. These keys are only used to process requests through your existing model provider accounts.
3. Generate Your DeepMyst API Key
You’ll need a DeepMyst API key to authenticate your requests:- In the DeepMyst dashboard, navigate to the “API Keys” section
- Click on “Generate New API Key”
- Enter a descriptive name for your key (e.g., “Development”, “Production”)
- Select the appropriate access level
- Copy the generated key and store it securely
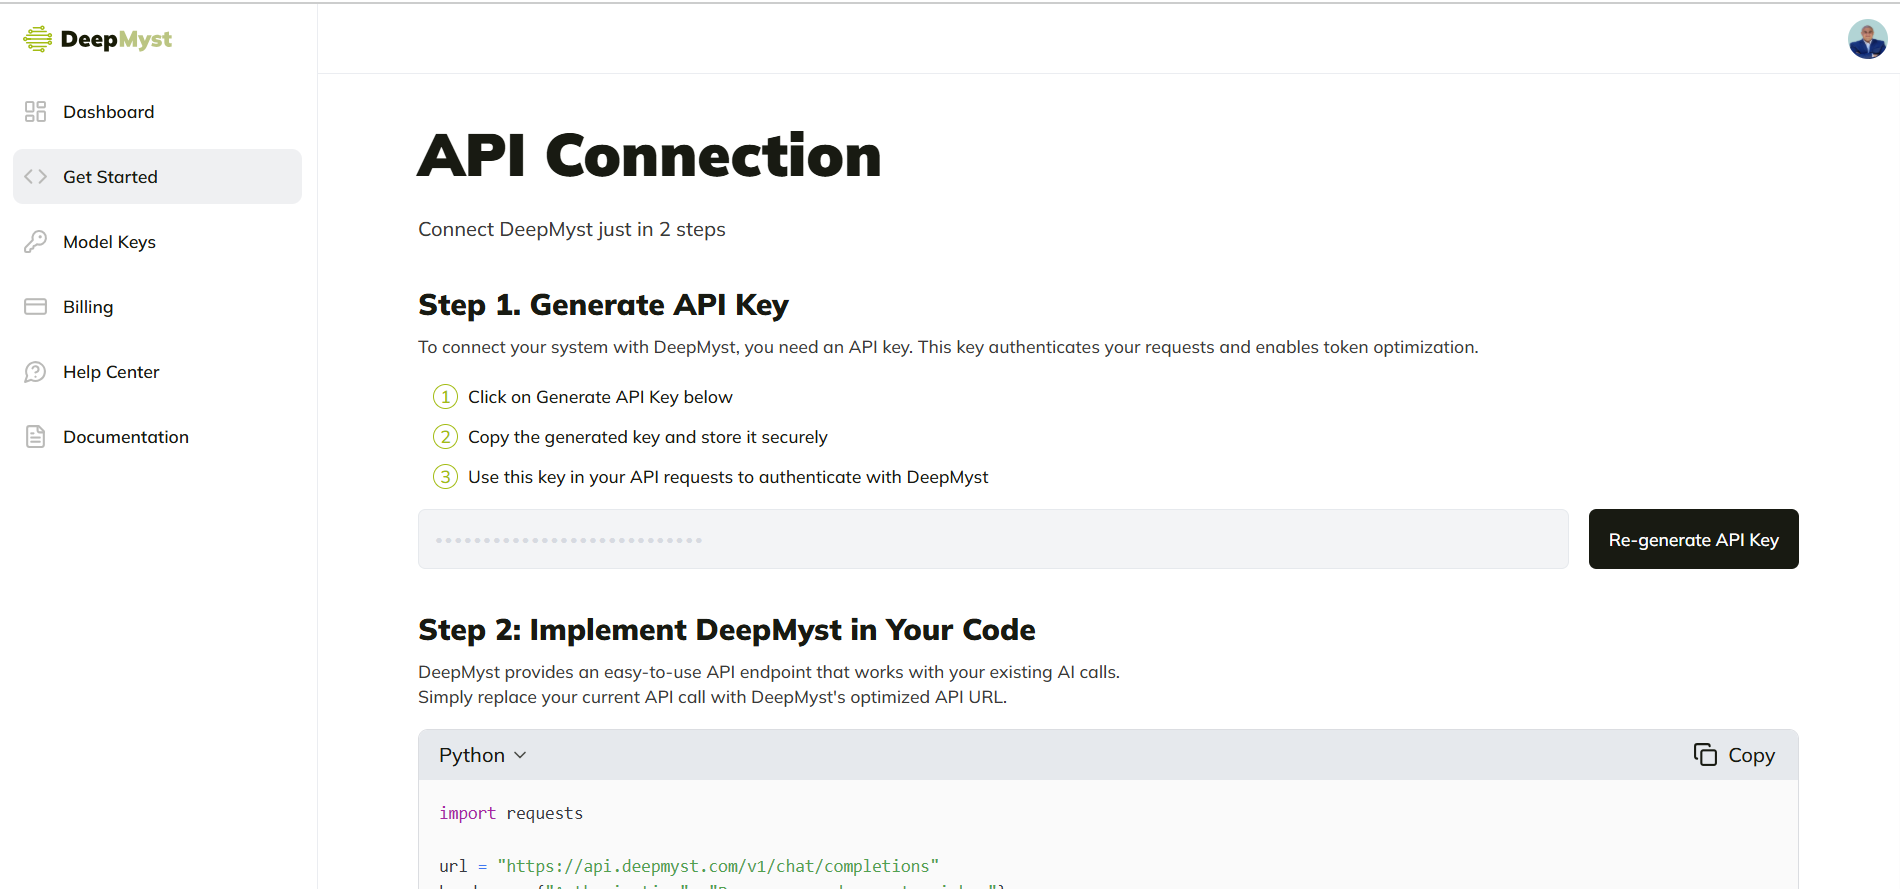
Important: Your DeepMyst API key is different from your provider keys. The DeepMyst key authenticates you to the DeepMyst service, while your provider keys allow DeepMyst to make calls to various AI models on your behalf.
4. Make Your First API Call
Once your account is set up, provider keys are added, and you’ve generated your DeepMyst API key, you can start making API calls. DeepMyst offers an OpenAI-compatible API, so you can use your existing code with minimal changes.Using Python
Using JavaScript/TypeScript
Using cURL
5. Verify Your Integration
To confirm that your DeepMyst integration is working correctly:- Check the response from your API call to ensure it contains the expected content
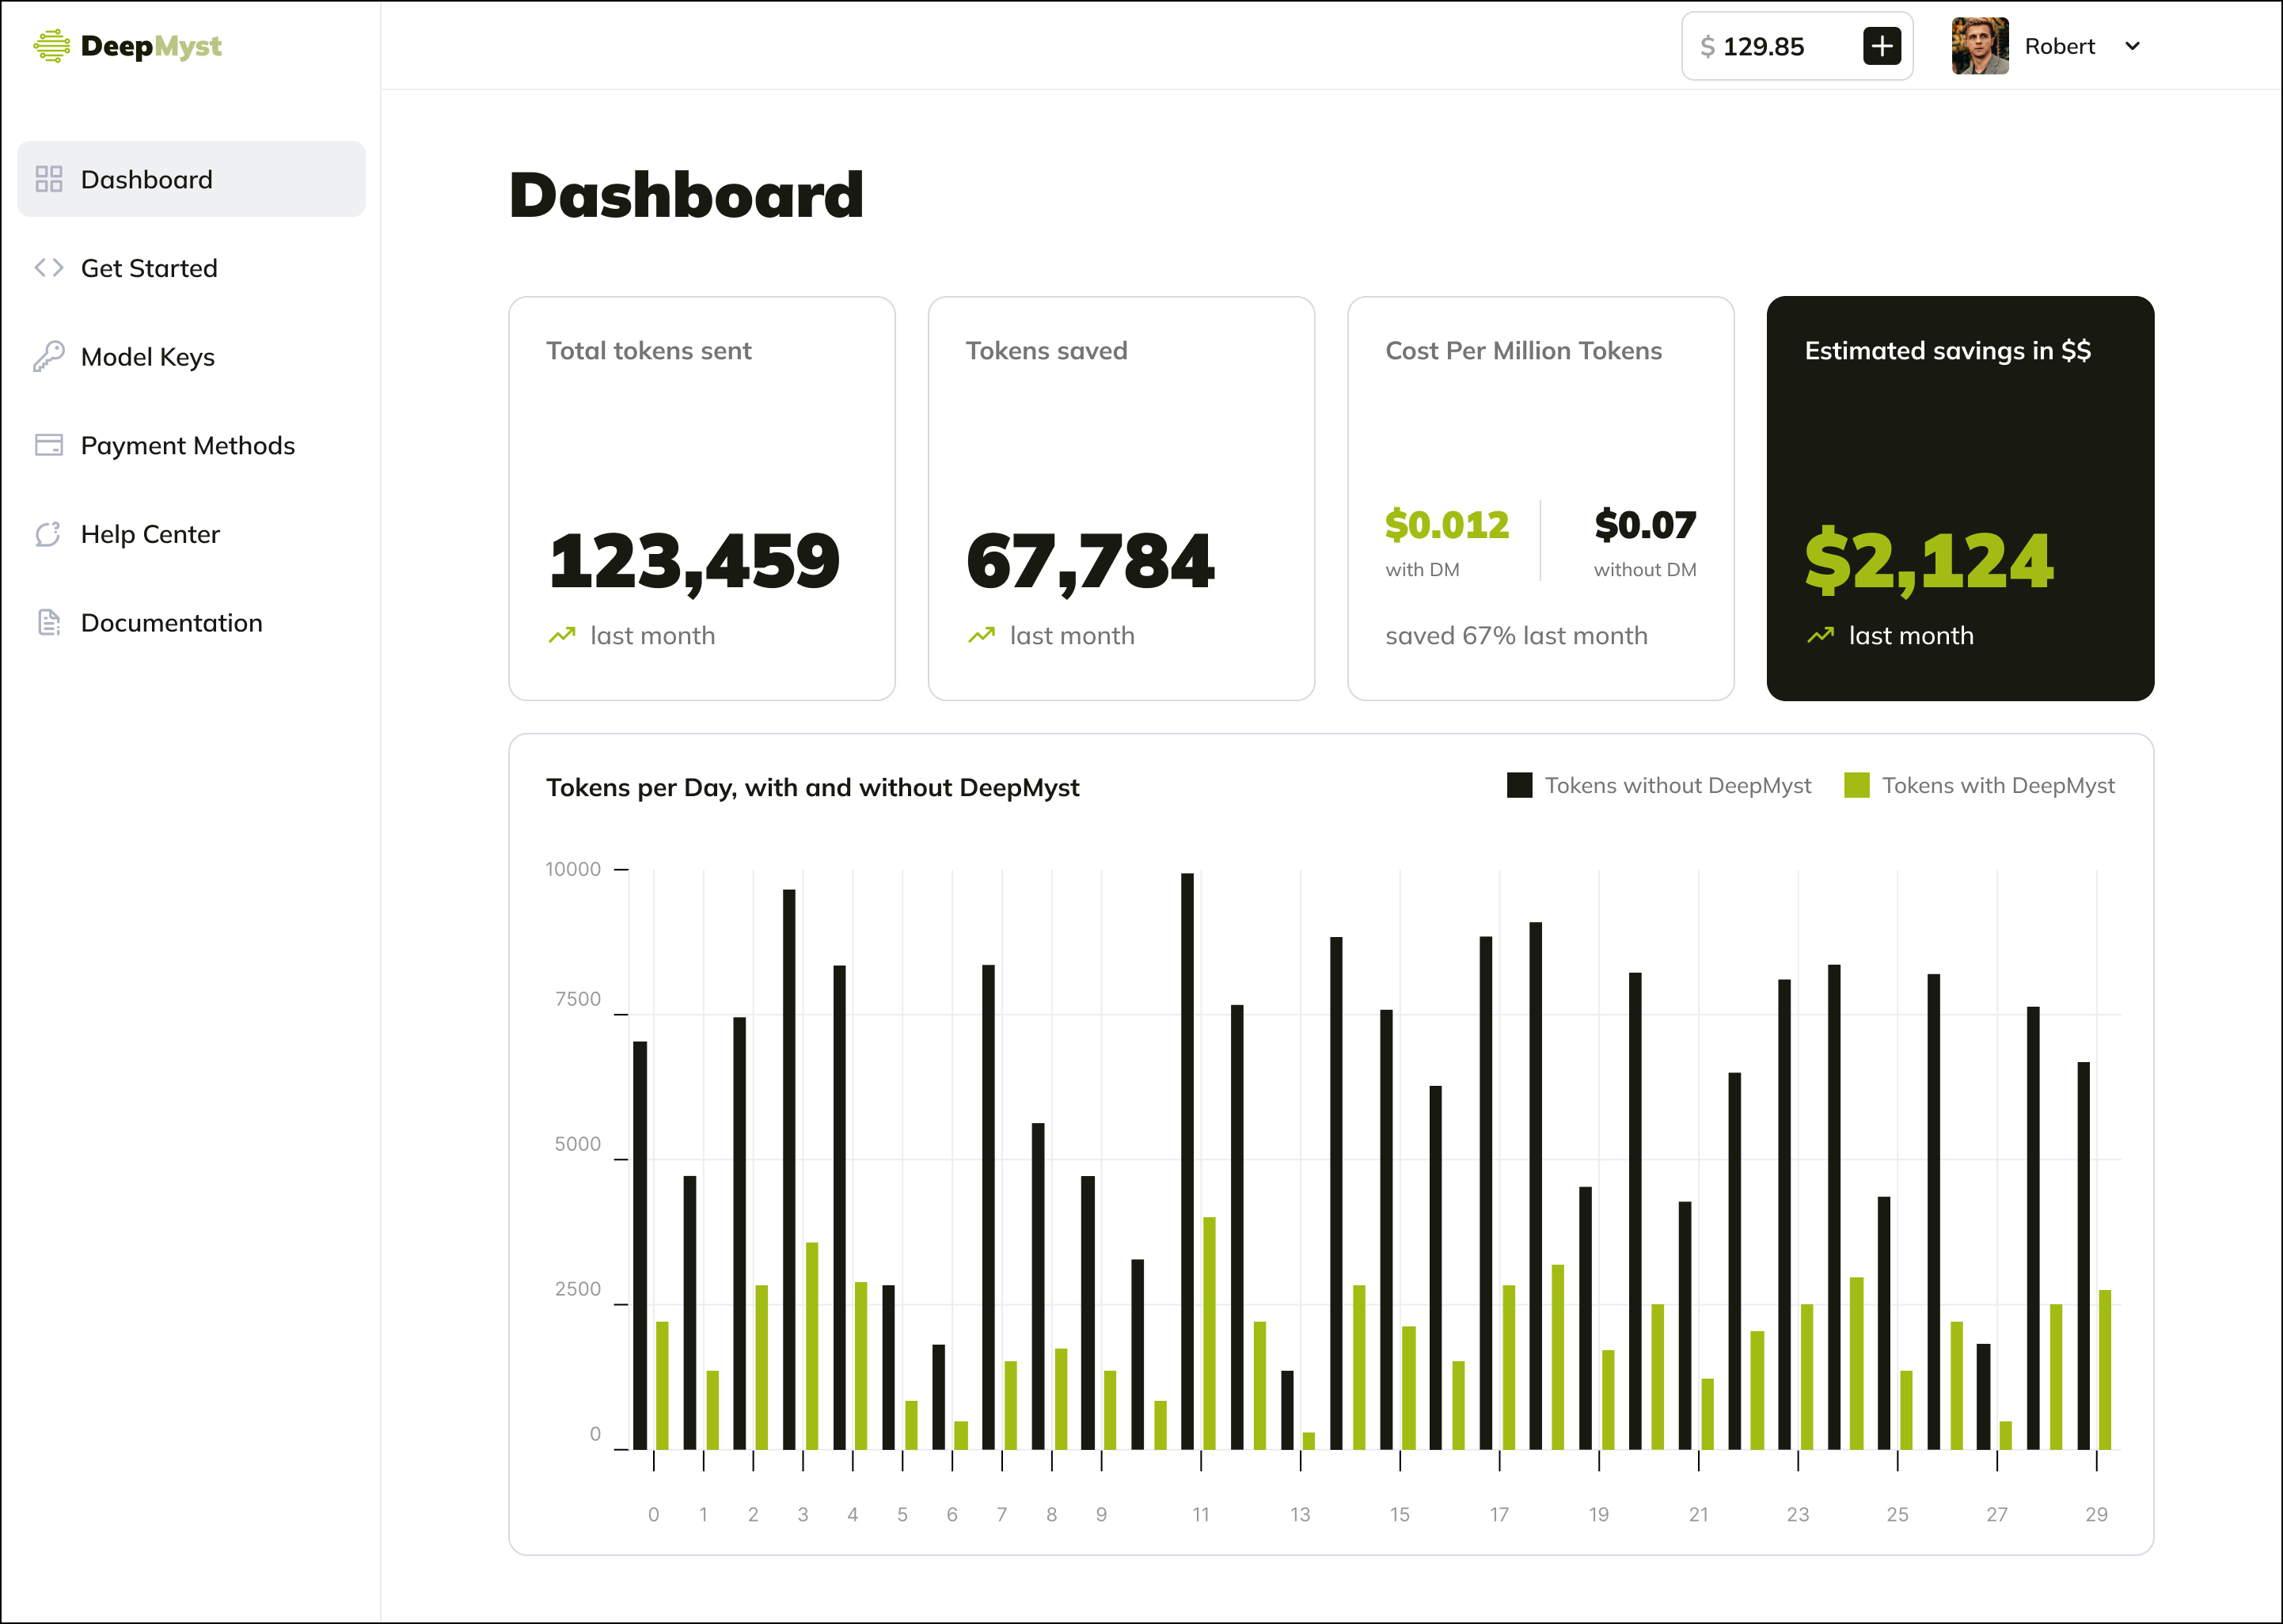
- Visit the “Usage” section in your DeepMyst dashboard to see your recent API calls
- Verify that the request appears in your usage logs with the correct model and token count
Next Steps
Now that you’ve set up your DeepMyst account and made your first API call, you can explore the advanced features that make DeepMyst powerful:Token Optimization
Learn how to reduce token usage and costs
Smart Routing
Discover intelligent model selection
Troubleshooting
If you encounter any issues during setup or making API calls:- Authentication errors: Verify that your DeepMyst API key is correct and being passed properly in the Authorization header
- Provider connection issues: Check that your provider API keys are valid and have sufficient quota
- Model not found errors: Ensure you’re using a supported model name
- Rate limiting: Check your current usage and plan limits in the dashboard